

This article is sponsored content, which helps support Rocky Mountain Student Media. Such articles are paid for by advertisers and are clearly labeled to distinguish them from articles produced by our journalists. Our editorial team operates independently, and sponsors have no influence over the stories we produce.
 Outdoor trips can look expensive from the outside. Tents, sleeping bags, jackets, stoves, mats, backpacks — it is easy to feel as if hiking or camping requires a full garage of equipment before you can even start. For students, the challenge is usually more practical: limited budget, limited storage and limited space in a backpack or car. The good news is that outdoor freedom does not begin with a full expedition kit. It starts with a small, smart setup that keeps you warm, dry and safe on short trips. The best camping gear for students is not the most complicated gear. It is the gear you actually use.
Buy for real trips, not fantasy expeditions
A common beginner mistake is buying for the trip you imagine, not the one you are actually likely to take.
If your realistic plan is a weekend hike after Friday classes, a short road trip with friends or a first night at a local campsite, you do not need equipment designed for a month in the mountains. You need reliable basics that work for everyday outdoor plans.
That means choosing items for clear use cases: local trails, car camping, weekend walks, colder evenings and damp mornings. This is how you build a practical outdoor gear checklist without filling your room with things you rarely use.
The core essentials every student should own
Your first kit should cover the basics: carrying gear, staying dry, keeping warm, drinking water, seeing in the dark and finding your way back.
Start with:
· a comfortable backpack that fits properly and is not oversized,
· a weather layer for rain and wind,
· an insulation layer for rest stops, evenings and early mornings,
· a water bottle or filter plus simple snacks,
· a headlamp, offline map or route, and a small first aid kit.
These are the real hiking essentials for beginners. They work for a Saturday trail, a group camping weekend or a spontaneous drive to a nearby national park.
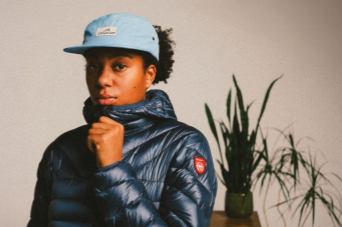
A down or insulated jacket can also be worth adding once you start spending more time outside in colder weather. It packs small, adds warmth quickly and is useful far beyond hiking.
Sleeping outside: the gear that matters most
The first night outdoors teaches most people the same lesson: sleep matters.
A poor night’s sleep does not just make you uncomfortable. It makes the next day harder. You wake up slower, make worse decisions and enjoy the trip less. For students trying to squeeze adventure between classes, work and deadlines, recovery matters.
A simple sleep setup needs three things:
a sleeping bag, a sleeping pad and one dry layer reserved only for night.
The sleeping bag is your main warmth layer. Look for realistic comfort rather than vague labels. The sleeping pad is just as important because the ground pulls heat from your body faster than many people expect. A dry sleep layer keeps sweat and damp clothing away from your insulation.
This is where lightweight camping gear makes sense: not because everything has to be tiny, but because warm, compact items are easier to carry, store and actually use.
What students can skip at the beginning
You do not need to buy everything at once. In fact, skipping the wrong items is one of the easiest ways to save money and space.
At the start, you can usually avoid:
· full-size toiletries,
· several outfit changes,
· heavy camping chairs if you are walking in,
· too many cooking gadgets,
· “just in case” extras that make the pack miserable.
Bring what solves real problems first: warmth, weather protection, sleep, water and basic safety. Everything else can wait until you know your own habits outdoors.
After a few trips, you will know whether you actually cook at camp, sit around for hours, hike in rain or prefer car-based weekends. Let experience shape the kit.
How to build a kit on a student budget
Student budgets do not leave much room for buying badly. Cheap gear can look appealing, but replacing the same item every semester is rarely cheaper in the long run.
Prioritise the items that affect safety and comfort: sleeping bag, sleeping pad, weather layer and insulation. These are worth choosing carefully because they shape your night, your warmth and your ability to keep going the next day.
For equipment used only once or twice a year, borrowing or renting makes sense. A stove, larger tent or specialist winter layer does not need to live under your bed all year if you rarely use it.
Buy slowly. Build around real trips. Upgrade only when something genuinely limits what you want to do.
Where quality gear makes sense
Some items are fine to buy basic. Others deserve more attention because they directly affect whether you sleep well, stay warm and keep your pack manageable.
Sleeping bags, insulated layers and compact camp gear are good examples. They need to balance low weight, warmth, durability and packability. That is why it helps to look at brands focused on real outdoor use rather than generic travel gear. One useful starting point is https://pajaksport.com/, especially if you want to compare lightweight sleeping and insulation options designed for repeated trips.
The point is not to buy the most technical item immediately. It is to understand which pieces are worth treating as long-term investments.
Packing from a dorm room
Storage is part of the student outdoor problem. A brilliant kit is not very useful if it turns your room into a gear landslide.
Keep one “weekend-ready” box or bag with your core items: headlamp, dry bags, first aid kit, socks, base layer and small accessories. Store your sleeping bag properly, and do not leave damp gear stuffed away after a trip.
Stuff sacks and dry bags help keep things organised, especially in shared rooms or small flats. When you return, clean and dry everything before packing it away. It prevents mould, smells and damaged insulation — none of which are great roommates.
Start small and get outside
The best outdoor kit is not the one that looks impressive online. It is the one that makes it easier to leave after class on Friday, sleep somewhere simple and wake up ready to walk.
Start with the basics: carry your gear comfortably, stay dry, sleep warm, bring water, and know where you are going. That is enough for a first campsite, a weekend road trip or a cold morning on a local trail.
You can add more later. For now, build a kit that fits your room, your budget and your actual weekends. Then get outside and let the next trip teach you what matters.